Photoshop
Portrait retouching, and how far to go
Retouching in photography is changing what is actually in the frame after the exposure: removing a spot, a stray hair, a piece of lint, a sensor mark, and evening out the tone of skin. Verdict: CURRENT. The 3 techniques that carry a professional portrait retouch, healing on an empty layer, frequency separation, and dodge and burn on a neutral grey layer, are the same operations they were in 2006 and no button replaced any of them. What has changed is the surrounding work: the selection step is faster, and the first tool of the job, the Spot Healing Brush, is in the free tier of the Photoshop app on iPhone that launched in February 2025, alongside selections, layers, masks and compositing.
CURRENT
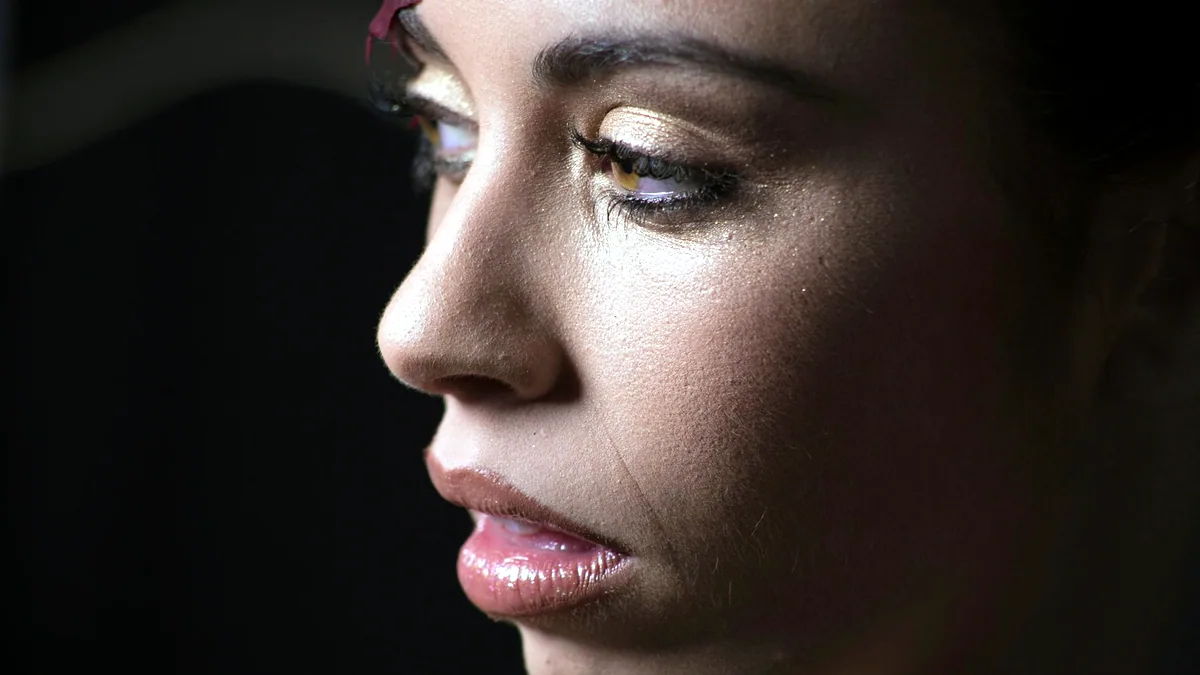
This site filed the same subject under the heading digital cosmetic surgery when it first ran, which was an honest name for what the technique had become and is still the right frame for the last section of this page.
Healing, cloning, and the difference that decides which you use
Healing and cloning look identical in the toolbar and behave differently in a way that matters within 3 pixels of any edge. The Healing Brush takes texture from the source you set and blends it with the colour and luminosity already at the destination. The Clone Stamp copies texture and tone together, unchanged. So healing self corrects for a small exposure difference between the source and the target, and cloning does not; and healing smears grey into your work when the destination sits beside something much darker, because the blend drags that darkness in, while cloning stays clean.
The working rule follows from that. Heal in open skin, cheeks, forehead, chin. Clone within about 3 px of a lash line, a hairline, a nostril, a lip edge or the frame border. The retouching tools share the J key and cycle with Shift J: Spot Healing Brush, Healing Brush, Patch Tool, Content-Aware Move Tool and Red Eye Tool. The Clone Stamp is separate, on S.
- Add an empty layer above the photograph and name it, so nothing is baked into the original pixels.
- Tick
Sample All Layersin the Options bar for the healing tools, and setSampletoCurrent & Belowfor theClone Stamp. - Set the source by holding
Altand clicking clean skin near the blemish, matching the direction of the light and the size of the pore structure. - Size the brush so it is just larger than the mark, using
[and], and click once rather than dragging. - Reset the source every few clicks, or the repeat of a distinctive freckle will start showing up in a grid across the face.
What goes wrong at step 3 is repetition. Cloned skin from one source used 40 times produces a visible pattern that nobody can name but everyone senses. Move the source constantly. The other failure is scale: a source sampled from the forehead of a portrait and used on the cheek carries pores at a different apparent size, because the forehead was closer to the lens.
Frequency separation, and the numbers that make it work
Frequency separation splits the picture into 2 layers so that colour and texture can be corrected without touching each other: a low frequency layer holding tone and colour, and a high frequency layer holding pores, stubble and fine hair. It is the technique behind skin that looks even and still looks like skin.
- Duplicate the photograph twice with
CtrlJ, and name the lower copylowand the upper copyhigh. - Hide
high, selectlow, and runFilter > Blur > Gaussian Blur. Raise the radius until skin blotches merge but the nose and jaw still read as themselves, commonly4to12 pxon a file of 20 to 24 megapixels and roughly half that at 12 megapixels. - Select
highand runImage > Apply Image. In an 8 bit file, setLayertolow,BlendingtoSubtract,Scaleto2andOffsetto128. In a 16 bit file, setBlendingtoAdd,Scaleto2,Offsetto0, and tickInvert. - Set
highto theLinear Lightblend mode at100%opacity, and the picture returns to exactly how it looked. - Work colour and blotch on
low: draw a looseLassoaround an uneven patch, feather it, and run a smallGaussian Blurinside the selection. - Work texture on
highwith theHealing BrushorClone Stamp, which will now move pores without dragging any colour with them.
The step people get wrong is the second one. Too small a blur radius leaves blemish colour on the high layer, so smoothing the low layer does nothing. Too large a radius pushes the face's actual shading down into the low layer, and correcting it there flattens the cheekbones. Check by hiding high and looking at low alone: you should see a soft but structurally complete face, not a fog.
Dodge and burn, which is where the shape comes from
Dodge and burn rebuilds the light on a face rather than removing anything from it, and it is the difference between a retouch that survives a 100% zoom and one that does not.
- Choose
Layer > New > Layer, setModetoSoft Lightin the dialog, and tick the option to fill with soft light neutral colour, which is 50% grey. - Take a round brush at
0%hardness,Opacityat100%andFlowat2%to5%. - Paint black over patches that are lighter than their surroundings and white over patches that are darker, building the correction in many passes.
- Add a temporary
Black & Whiteadjustment layer at the top of the stack while you work, so you judge tone with the colour switched off, and delete it when you are done. - Hide and show the grey layer regularly, because the effect creeps and you stop seeing it.
50% grey is the neutral value for Soft Light, which is why the layer starts invisible; the same neutral point governs Overlay and Hard Light, and the full set is on the blend modes page. If you would rather work with more control, 2 Curves layers, one raised and one lowered with both masks inverted to black, do the same job and let you change the strength afterwards.
Feathering, and why every retouch depends on it
Feathering is the control that decides whether a retouch is visible. It fades a selection's edge across a set distance instead of cutting it dead, so the correction inside the selection dies away gradually and there is no line where the work stops. Skin has no hard edges anywhere on it, which is why an unfeathered selection reads as retouching from across the room even when the correction itself was right.
4 controls produce that same smooth transition, and they are worth knowing as one idea:
- Feather a live selection with
Select > Modify > Feather, orShiftF6, entered in pixels. - Set
Featherin the Options bar before drawing with aLassoorMarquee, which applies as you draw and cannot be changed after. - Use the
Featherslider in a layer mask'sProperties, which is the only one of the 4 that stays adjustable a week later. - Draw a black to white
Gradienton a mask, or runGaussian Bluron the mask, for transitions wider than a slider comfortably covers.
Useful amounts, on a 24 megapixel file: 1 to 2 px against a defined object edge, 20 to 60 px to blend 2 skies, and 200 px or more for a vignette. The wider group of photo editing techniques divides into 2 kinds, and it is worth keeping them apart: grading changes tone and colour across the whole frame, while retouching changes what is in it. Cropping, exposure, white balance and sharpening are grading. Healing, cloning, frequency separation, compositing and Removing a background in Photoshop are retouching.
How far to go, and the test that settles it
The question of how far to retouch a real person has one test that resolves most cases: would it be gone in 2 weeks anyway? If yes, it is a condition of that day and not of that person, and removing it is uncontroversial. If no, it is the person, and changing it produces a picture of somebody who does not exist.
| Gone in 2 weeks, remove freely | Part of the person, ask first |
|---|---|
| A spot, a stray hair across the cheek, lint on a collar | A scar, a mole, a birthmark, freckles |
| Sensor dust, a softbox reflected in glasses, a bra strap that slipped | Lines around the eyes and mouth, tooth shape and spacing |
| A crease in a shirt, food between the teeth, a red patch from the cold | Nose shape, jaw shape, waist and arm width, skin tone |
Ask the person. That is the whole ethical mechanism and it costs one sentence before the shoot. Somebody who says leave the scar has told you what the picture is for, and somebody who was never asked has not agreed to anything. Genre decides the rest: a news or documentary photograph gets a sensor spot removed and nothing else, because altering content there is a different act from cleaning a frame. Before reshaping a body in a commercial image, check what the market it will run in requires you to disclose, since altered advertising pictures are regulated in some places and the rules move.
There is also a purely visual line, and it is easy to see. Skin at 100% zoom has pore texture almost everywhere except a specular highlight. Once smoothing has removed it, the face reads as a rendering rather than a photograph, and adding noise back does not restore it, because real pores have direction and size that follow the surface. Liquify, at Shift Ctrl X, has the same threshold: turn Show Mesh on and watch the straight lines behind the subject, because a bent door frame or a rippled skirting board behind a narrowed waist is what gives a reshaped body away every time.
Checking your own work before you send it
Check a retouch in 5 passes, because you go blind to your own corrections within about 10 minutes of starting them.
- Look at
100%zoom for texture faults, then at25%for patchiness, since each hides what the other shows. - Flip the canvas with
Image > Image Rotation > Flip Canvas Horizontal, look again, and flip it back. - Drop a harsh
CurvesS shape on top temporarily, which exposes uneven dodge and burn instantly, then delete it. - Toggle the whole retouch group off and on. If the identity of the face changes in that toggle, go back.
- Keep the untouched original, not for the client, for you.
Every operation named here is indexed on Photoshop, operation by operation. If you are working without a desktop subscription, the free tier on Photoshop on a phone covers the healing stage, and the free alternatives page names GIMP, Krita, Photopea and Paint.NET for the rest; the fuller mobile feature set is a paid plan, either an existing desktop subscription or the Photoshop Mobile and Web plan.
Where to go next
Keep making.
All guides One click now
Remove the background. Keep the detail.
Start with one click. Learn what to do when hair, glass and difficult edges need a little more care.
 Still relevant
A better way to blend in.
Understand what blend modes actually do, and choose the right one for the image.
 Still relevant
The right brush changes everything.
Find, install and make sense of the brushes that belong in your toolkit.